Hey there! We’re so thrilled that you’ve purchased a CleanView® Rewind Pet Vacuum Cleaner. This quick video will guide you through the simple assembly steps to get your vacuum up and running. All you’ll need is a Phillips head screwdriver.
Start by attaching the upper handle to the base and securing it with the two screws provided. Then, insert the extension wand into the back of the vacuum and twist it clockwise to lock it into place. Attach the hose by twisting it clockwise into the back of the vacuum, and wrap the rest of the hose around the handle. Finally, add the accessory tools – the crevice tool stores inside the extension wand, the dusting brush goes at the back of the handle, and the turbo brush tool sits on the top front of the upper handle. Once you’re done assembling, you’re ready to start cleaning!
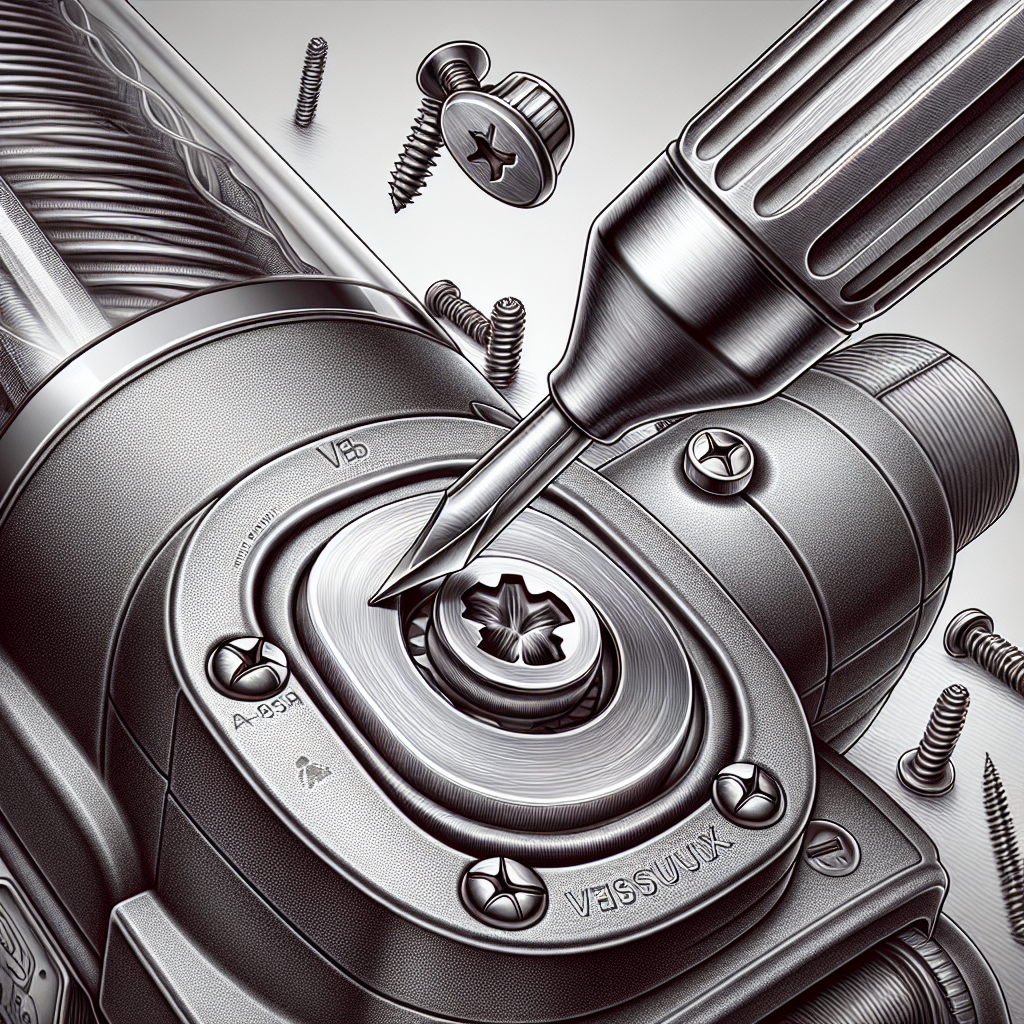
Assembling the Upper Handle
Attaching the upper handle to the base
To start assembling your CleanView® Rewind Pet Vacuum Cleaner, you will need to attach the upper handle to the base. Place the upper handle onto the base and push it down firmly until it is securely in place. Make sure that the handle is aligned properly with the base.
Securing the handle into the base
Once you have attached the upper handle to the base, you will need to secure it into place using the two screws that are taped to the handle. Locate the screws and use a Phillips head screwdriver to tighten them. Make sure that the screws are tightened properly to ensure that the handle is securely attached to the base.
Attaching the Extension Wand and Hose
Locking the extension wand into place
After assembling the upper handle, it’s time to attach the extension wand and hose. Start by placing the extension wand base in the back of the vacuum. Take note of the arrows on the extension wand base, they should line up with the arrows on the vacuum. Once aligned correctly, turn the extension wand clockwise to lock it into place. You will hear a click to confirm that it is securely attached.
Securing the hose into the back of the vacuum
Now it’s time to secure the hose into the back of the vacuum. Take the end of the hose and insert it into the back of the vacuum, making sure it is properly aligned. Just like with the extension wand, turn the hose clockwise to lock it into place. Again, listen for the click to ensure that it is securely attached.
Wrapping the Hose
Wrapping the rest of the hose around the hose wrap on the handle
Now that the extension wand and hose are securely attached, it’s time to wrap the rest of the hose. Start by wrapping the remaining length of the hose around the hose wrap located on the handle. Make sure to wrap it neatly and securely to prevent any tangling or damage to the hose.
Inserting the end of the hose into the vacuum base
Once you have wrapped the hose around the handle, insert the end of the hose into the vacuum base on the right side. Find the slot designated for the hose and gently push it in until it is fully inserted. This will help keep the hose neatly stored and easily accessible when you need to use it.
Adding the Accessory Tools
Storing the crevice tool inside the extension wand
In order to keep your accessory tools organized, start by storing the crevice tool inside the extension wand. The crevice tool is designed to fit snugly inside the extension wand, maximizing space efficiency. Simply insert the crevice tool into the designated slot on the extension wand until it is securely in place.
Placing the extension wand and crevice tool in the back of the vacuum
After storing the crevice tool, it’s time to place the extension wand and crevice tool in the back of the vacuum. There is a storage compartment specifically designed to hold these tools. Gently slide the extension wand and crevice tool into the compartment until they fit snugly. This ensures that they are always within reach and ready to use.
Attaching the dusting brush to the back of the handle
Next, attach the dusting brush to the back of the handle, just under where the hose wraps at the top. The dusting brush is designed to slide onto the handle and stay securely in place while you clean. This makes it easy to access and prevents it from getting misplaced.
Placing the turbo brush tool on the top front of the upper handle
Lastly, place the turbo brush tool on the top front of the upper handle. This tool is specifically designed for deep cleaning and removing pet hair. The turbo brush tool easily attaches to the upper handle, ensuring it is always within reach when you need it. This allows for efficient and effective cleaning, especially in areas where pet hair tends to accumulate.
Conclusion
Congratulations on successfully assembling your CleanView® Rewind Pet Vacuum Cleaner! By following these simple steps, you have now familiarized yourself with the various components of your vacuum and how to properly assemble them. You are now ready to tackle any cleaning tasks and ensure that your home remains pet hair-free. Happy cleaning!